Grade 10-11 Lesson 3
Lesson3 – Introduction to Word Processing
FET Digital Skills Programme | Grade 10–11
| Welcome to Week 3 of the Basic Digital Skills Programme! Last week you mastered organising files and folders now we put those files to work. This week we explore word processing: the skill of creating, editing, and formatting text documents on a computer. By the end of this 60-minute lesson, you will be able to produce a neat, well-formatted document from scratch. |
Topic 1: What Is Word Processing?
 Before computers, people used typewriters to write letters, reports, and documents. Word processing is the modern, digital way of creating and managing text documents using a computer and it is infinitely more powerful than any typewriter.
1.1 Definition
Word processing is the use of computer software to create, edit, format, save, and print text documents. The software used is called a word processor.
1.2 Common Word Processing Software
There are several word processors available. Some require payment; others are completely free:
| Software | Creator | Cost |

Microsoft Word |
Microsoft | Paid : part of Microsoft 365 |

Google Docs |
Free : requires internet access | |
| LibreOffice Writer |
The Document Foundation | Free and open-source |
| WPS Office Writer |
Kingsoft | Free basic version available |
| Apple Pages |
Apple | Free on Apple devices only |
In this lesson we use Microsoft Word as our main example, but the principles apply equally to all word processors.
1.2 What Can You Do With a Word Processor?
- Write and edit letters, essays, reports, and CVs
- Change the appearance of text: fonts, sizes, colours, and styles
- Add images, tables, and charts to documents
- Check spelling and grammar automatically
- Save documents in different formats (docx, .pdf, .txt)
- Print documents directly from the software
1.3 Key Vocabulary
| Term | Meaning |
| Word processor | Software used to create and edit text documents |
| Document | A file created in a word processor |
| Cursor | The blinking line showing where you are typing |
| Ribbon / Toolbar | The bar at the top of the screen with tools and options |
| Font | The style of the letters used (e.g., Arial, Times New Roman) |
| Formatting | Changing the appearance of text or the layout of the page |
| File extension | Letters after a file name showing the file type (e.g., .docx) |
Topic 2: Creating and Saving a Document
Creating a document is the first practical step. In this topic you will learn how to open Microsoft Word, start a new document, type text, and most importantly save your work so it is never lost.
2.1 Opening Microsoft Word
Follow these steps to open Microsoft Word on a Windows computer:
| Step-by-Step: Opening Microsoft Word
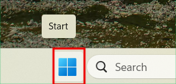
Step1: Click the Start Menu (the Windows icon) in the bottom-left corner of the screen.
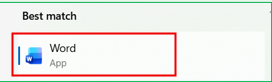
Step2: Type “Word” in the search bar, or scroll through the programme list.
Step3: Click on Microsoft Word when it appears in the results.
Step4: The Word Start Screen opens. Click Blank document to begin. |
2.2 Typing Your First Document
- Click anywhere on the white document area and a blinking cursor will appear.
- Start typing. The cursor moves right as you type.
- Press Enter to move to a new line (new paragraph).
- Press Backspace to delete the character to the LEFT of the cursor.
- Press Delete to delete the character to the RIGHT of the cursor.
- Press Ctrl + Zto Undo the last action: very useful for mistakes!
2.4 Saving a Document
Saving your work is one of the most important habits you can develop. If you do not save, you will lose everything when the computer is switched off or if there is a power cut.
| How to Save a document for the First Time (Save As)
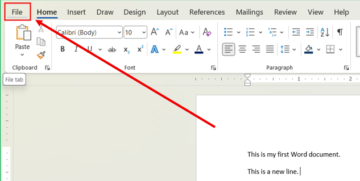
Step1: Click File in the top-left corner of the screen.
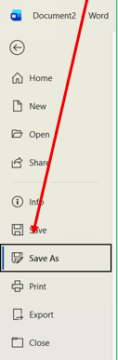
Step2: Select Save As from the menu.
Step3: Choose a location -> Double Click on This PC
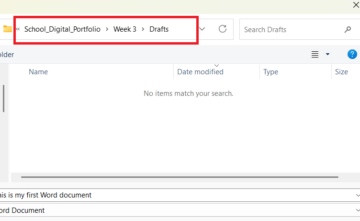
Step4: Go to your School_Digital_Portfolio Folder ->Select Week 3 -> — Select Drafts and put the document there.
Step 5: In the File name box, type a meaningful name (e.g., Week3_MyFirstDocument). Step6: Make sure the file type shows Word Document (*.docx). Step7: Click Save. |

| Saving Changes to an Existing Document
1. Click File then Save, OR 2. Press Ctrl + S on the keyboard, the fastest and easiest method. |
Tip: Press Ctrl + S every few minutes while you work. It takes less than one second and can save hours of lost work. Make it a habit save after every paragraph you type!
| Remember: A good file name helps you find your document quickly and keeps your digital portfolio organised and this is a skill you practised in Lesson 2
• Use a descriptive name: HistoryEssay_Term2, not Document1. • Replace spaces with underscores (_) or hyphens (-). • Avoid special characters: / \ : * ? < > | • Keep names short but meaningful. • Add a date or version number if you have multiple drafts: CV_March2025_v2. |
 |
Topic 3: Basic Text Formatting
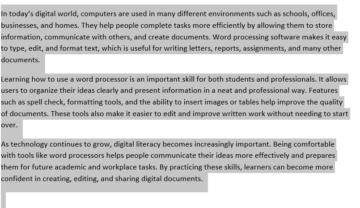
Formatting means changing how your text looks on the page. Good formatting makes a document easier to read and more professional. All formatting tools are found on the Home tab in Microsoft Word.
![]()
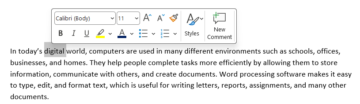
3.1 Selecting Text
You must select (highlight) text before you can format it:
- Click and drag the mouse over the text you want to select.
| Double-click a word to select only that word.
|
 |
| Triple-click to select an entire paragraph.
|
 |
| Press Ctrl + A to select ALL text in the document.
|
 |
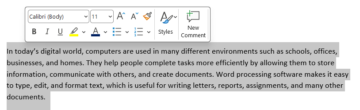
Selected text appears highlighted in blue/grey. Any formatting you apply will affect only the selected text.
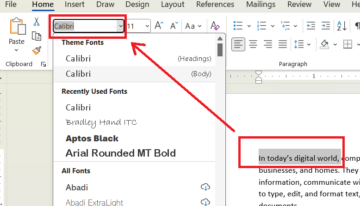
3.2 Font and Font Size
| Changing the Font
1. Select the text you want to change. 2. On the Home tab, find the Font box (shows the current font name, e.g., “Calibri”).
3. Click the dropdown arrow and choose a font from the list.
|
| Changing the Font Size
1. Select the text. 2. Click the Font Size box (shows a number, e.g., “11”).
3. Type a size or choose from the dropdown, then press Enter.
|

3.3 Bold, Italic, and Underline
These are the three most commonly used formatting options. Apply them with a single keyboard shortcut:
| Format | Keyboard Shortcut | Button | When to Use |
| Bold | Ctrl + B | 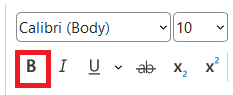 |
Headings, key terms, important words |
| Italic | Ctrl + I | 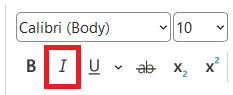 |
Titles of books, films, or emphasis |
| Underline | Ctrl + U | 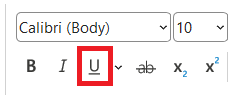 |
Links, key terms, subheadings |
| Do not over-format! Using too many bold, italic, and underlined words makes a document messy and harder to read. Use formatting to highlight only the MOST important information. |
3.4 Text Alignment
Alignment controls how text lines up horizontally on the page. There are four options:
| Alignment | Shortcut and Button | Description and When to Use |
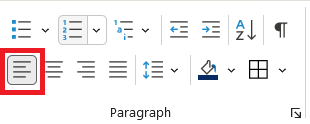
| Left Align | Ctrl + L
|
Text lines up on the left. Used for most body text. |
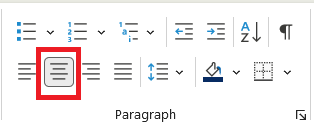
| Centre Align | Ctrl + E
|
Text is centred. Used for headings and titles. |
| Right Align | Ctrl + R
|
Text lines up on the right. Used for dates and addresses. |
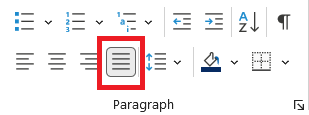
| Justify | Ctrl + J
|
Text lines up on both sides like a newspaper. Used in formal documents. |

3.5 Additional Formatting Tools
| Font Colour |  Click the A with a coloured underline to change the text colour Click the A with a coloured underline to change the text colour |
| Highlight: |  Adds a colour behind text, like a highlighter pen. Adds a colour behind text, like a highlighter pen. |
| Strikethrough: | |
| Superscript: | |
| Subscript: | |
| Clear Formatting: |
Topic 4: Inserting Images
Images make documents more visually appealing and easier to understand. In Microsoft Word you can insert images from your computer or from an online library. Remember: images you insert are saved inside your .docx file, so keep images reasonably sized to avoid a very large file.
4.1 Why Add Images to Documents?
- To illustrate a concept or process (e.g., a diagram in a science report)
- To make a document more attractive (e.g., a poster, flyer, or newsletter)
- To provide visual evidence (e.g., a photo in a project)
- To break up large amounts of text and make reading easier
4.2 Inserting an Image From Your Computer
| How to insert an image in your document
2. Click the Insert tab at the top of the screen.
3. Click Pictures in the Illustrations group.
4. Select This Device (or Insert Picture from File).
6. Click on the image file, then click Insert.
|
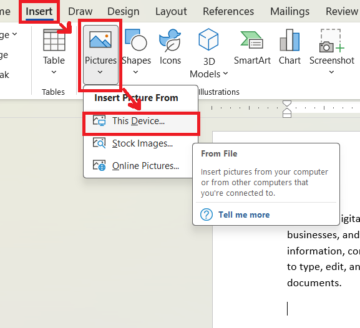 1. Click on the spot in your document where you want the image to appear.
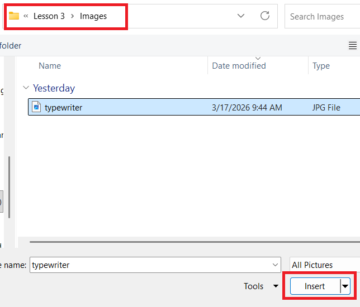 5. Navigate to the folder where your image is saved.
4.3 Inserting an Online Image
| How to insert an online image in your document
2. Click Pictures then Online Pictures (or Stock Images).
3. Type a keyword in the search bar (e.g., “computer”, “South Africa”).
4. Click the image you want to use, then click Insert. Always check that an image is labelled Creative Commons or Royalty Free before using it in a document you will share. |
 1. Click the Insert tab.
4.4 Resizing an Image
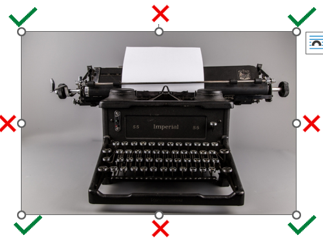
- Click on the image. Small squares (handles) appear around the edges and corners.
- Drag a CORNER handle to resize, this keeps the image proportional.
- Never drag a SIDE handle; this stretches the image out of shape.
4.5 Text Wrapping
Text wrapping controls how the text in your document flows around the image. The default is In Line with Text, which can make layout tricky. Here are the main options:
| Wrapping Option | What It Does |
| In Line with Text | Image sits in the text like a large character. Moves when text changes. |
| Square | Text wraps around the rectangular box surrounding the image. |
| Tight | Text wraps closely around the actual outline of the image. |
| Behind Text | Image sits behind the text (used for watermarks or backgrounds). |
| In Front of Text | Image sits on top of the text and covers it. Use with care. |
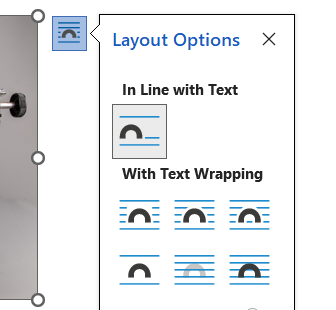
To change wrapping: Click the image, then click the small Layout Options icon that appears beside it, then choose your preferred wrapping style.
|
Tip :
If you want to change or improve how your picture looks in Microsoft Word, click on the image first. When you do this, a Picture Format tab will appear on the task bar at the top of the screen. From this menu, you can do many things such as remove the background, crop the image to the size you want, add borders, and apply different picture effects to make your document look better. See image below. |

LESSON CONCLUSION: THERE IS MUCH MORE YOU CAN DO IN WORD
In this lesson you learned the foundations of word processing: creating a document, saving your work, formatting text, and inserting images. These are the core skills you will use every time you create a document.
However, Microsoft Word can do much more than what we covered today. As you continue learning, you will discover tools that help you create more advanced and professional documents.
For example, in Word you can also:
- Insert tables to organise information neatly into rows and columns.
- Create headers and footers to add page numbers, dates, or your name on every page.
- Use styles and themes to automatically format headings and paragraphs.
- Add page borders and backgrounds to design posters or flyers.
- Insert charts and SmartArt to present information visually.
- Use spelling and grammar tools to automatically correct writing mistakes.
- Export documents as PDF files so they can be easily shared with others.
You can explore many of these features by clicking on the different tabs on the Ribbon, such as Insert, Design, Layout, and Review. Hover your mouse over the buttons to see a short description of what each tool does.
The best way to learn Word is to experiment and practise. Try creating your own documents, change the formatting, add images, and explore the tools available in the ribbon.